


Cog of Destiny
Overall
| Conditions | New Units | ||||
|---|---|---|---|---|---|
|
|


Map Data
| Player | Enemy | NPC |
|---|---|---|
| 15+1 | 45+48 | 0 |
Boss Data
LloydLevel 18

| Class | Inventory |
|---|---|


| HP | Str | Skl | Spd | Lck | Def | Res | Con |
|---|---|---|---|---|---|---|---|
| 55 | 21 | 25 | 23 | 16 | 16 | 20 | 9 |
LinusLevel 18

| Class | Inventory |
|---|---|

| HP | Str | Skl | Spd | Lck | Def | Res | Con |
|---|---|---|---|---|---|---|---|
| 62 | 25 | 22 | 16 | 14 | 20 | 16 | 14 |
Click to inspect
Obtainable Items
| Item | Source |
|---|---|
| Steal from enemy Cavalier | |
| Steal from enemy General (Normal Mode) | |
| Steal from enemy Hero (Normal Mode) | |
| Steal from enemy Nomad Trooper (Normal Mode) | |
| Steal from enemy Sniper (Normal Mode) | |
| Steal from enemy Warrior (Normal Mode) | |
| Steal from enemy Sniper (Hard Mode) | |
| Visit village | |
| Dropped by Lloyd or Linus |


Shops
| Shop | Items/Price |
|---|---|
| Armory |
|
| Vendor |


Reinforcements
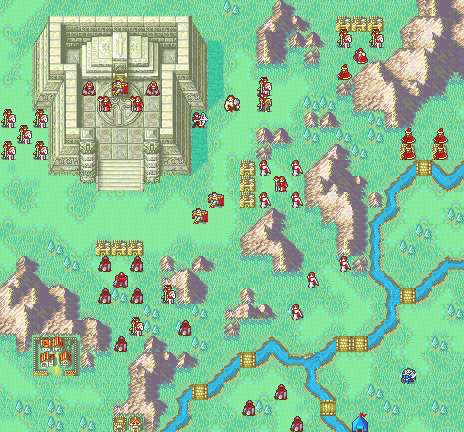
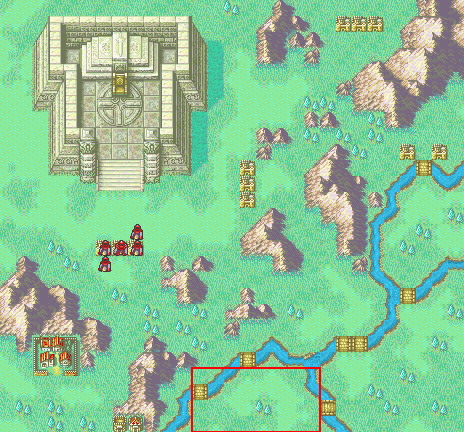
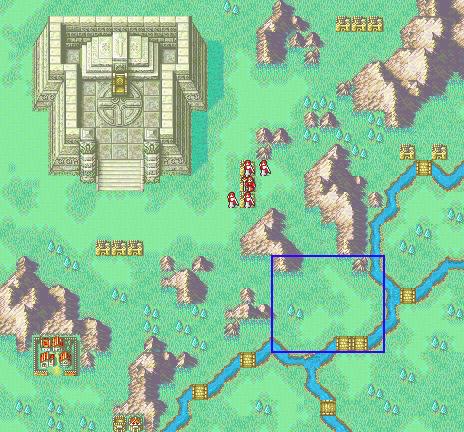
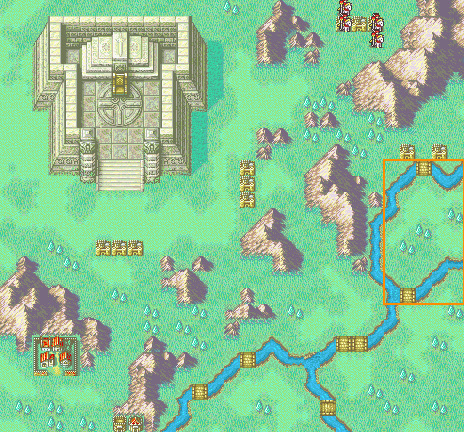
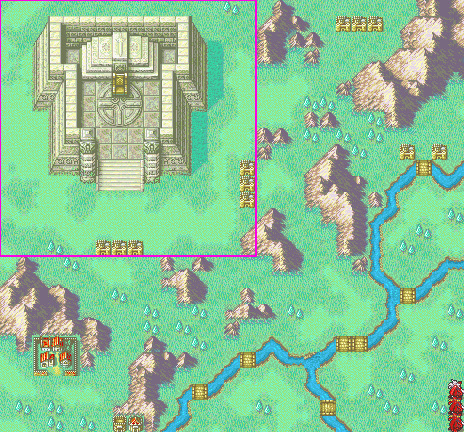
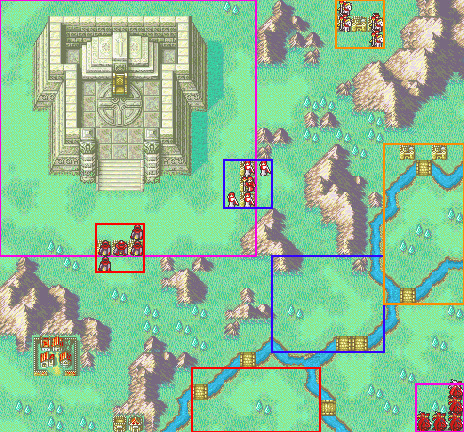
- There are 4 reinforcement zones in this map, refer to the appendix. Each set of reinforcements will spawn before every other player phase for 8 player phases (for a total of 4 spawns each), starting from the next player phase after a unit ends their turn in the marked zones.
- Red zone: 1 Druid, 4 Shamans spawn from the forts under the throne room (Appendix 1).
- Blue zone: 1 Bishop, 4 Monks spawn from the forts southeast of the throne room (Appendix 2).
- Orange zone: 4 Valkyries spawn from the northeastern forts (Appendix 3).
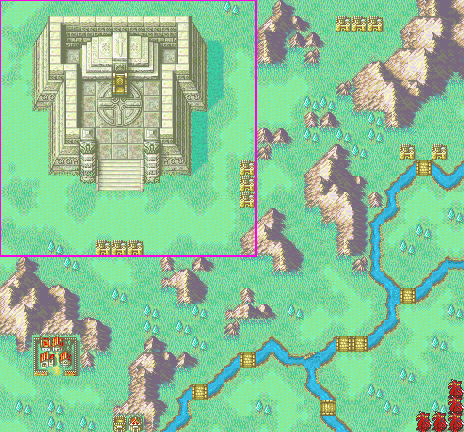
- Pink zone, spawning from the southeast: first turn, Vaida and 2 Wyvern Riders (Appendix 4); subsequent turns, 5 Wyvern Riders (Appendix 5). These reinforcements spawn for 4 consecutive turns instead of every other turn for 8 turns.
Notes
- The boss will be either Lloyd or Linus, whichever one was not fought in Four-Fanged Offense.
- Nino can talk to the boss of this map, however they will not join you. Instead, they will start moving around to attack your units.
- This is the last chapter where you can deploy Ninian, she will be replaced by Nils for the remainder of the game.
Appendix
Click to inspect
Click to inspect
Click to inspect
Click to inspect
Click to inspect
Click to inspect